I decided to buy a Marcus 50W amp head from Crab Guitar Effects. It is inspired by the Mesa Boogie Mark IIC++/III series amps and is likely the most popular Crab model. The amp took about 11 weeks to build from my order in May 2025. The lead time increased by approximately 1 month since I last ordered a Benzin head. Shipping from Ukraine to the NE USA then took 9 days.
I am not particularly educated about Mark-series amps, but am excited to explore the tones in the amp. The cleaner mode is selected with the Drive push-button off, while the most common distorted lead and rhythm tones are achieved with the Drive engaged. I had to read the Mesa Mark IIC+ reissue manual several times to understand the functions of the switches.
I started off with the more distorted channel/mode. I turned the bass/middle off, treble/presence high, and adjusted the 5-band EQ. The graphic EQ affected the sound in a drastic way. I turned each band up/down for the most pleasing sound until I arrived at the setting shown in the photo. I arrived at the general V shape, except I preferred the 6500Hz slider around the middle.
There are many push-button switches in place of the push-pull pots of the Mesa amps. My initial preference for lead tones is Deep-On, Bright-Off, Boost-Off, Bass Shift-Off, and Treble Shift-On or Off depending on mood.
With the Drive off, I was able to dial in some nice clean tones.
I quickly put together a short mix using my Ibanez SZ520 into the Marcus. The speaker out was connected to my Suhr Reactive Load to get into my DAW. I used my 4x12 Vintage 30 IRs for the cab simulation.
 |
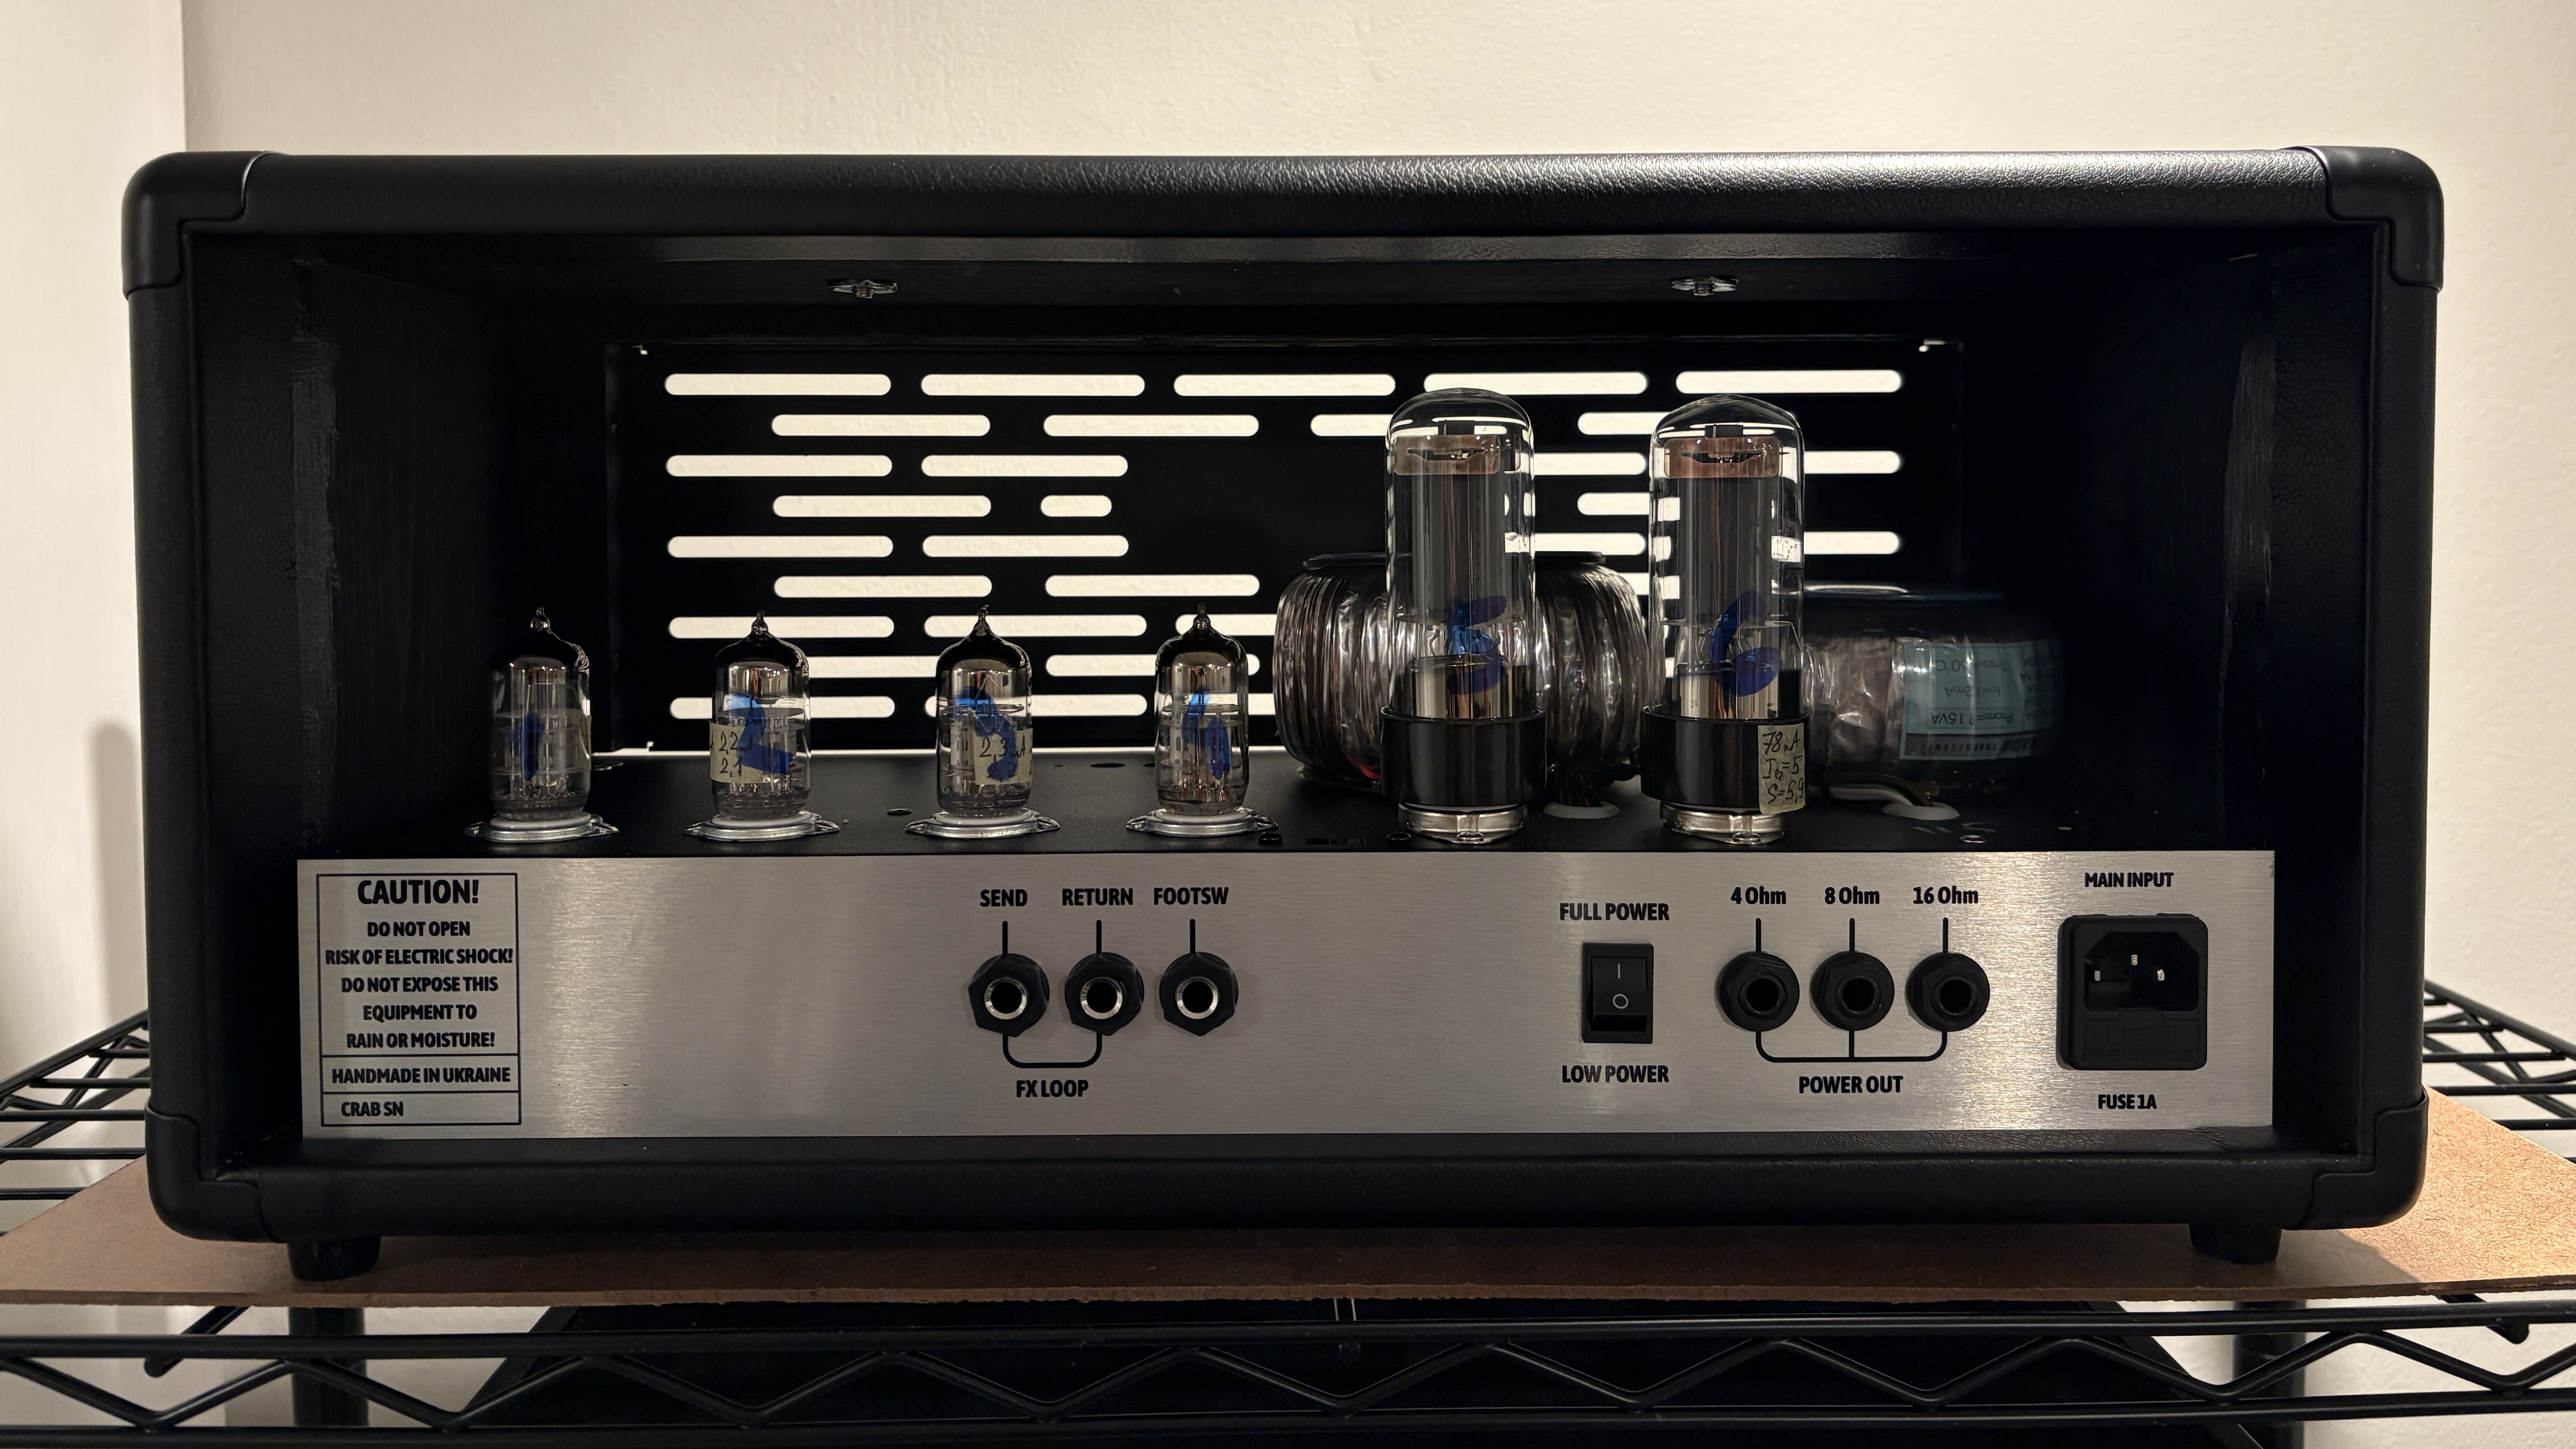
| Rear of the Marcus. |
The rear panel has a C++/III switch, which I can only guess is similar to the Crunchberries amp. Otherwise, the rear panel features are the same as the other Crab amps (series effects loop, pentode/triode switch, foot switch input, 4/8/16 ohm jacks).
It is clearer on this Marcus what Crab Amps is providing on these amps for tubes. The preamp tubes are likely 6N2P, as the back panel is labeled ECC83/6N2P. The power tubes have visible 6N3C labels on them. These are apparently the Soviet-era equivalent of the 6L6GC power tube. My Crab Benzin did not have any markings to identify the tubes.
 |
| Old Crab Footswitch on the Left, New on the Right. |
A 2 button foot switch is provided to access the Drive and Boost front panel functions. The new footswitch has labels to better identify the functions.