Featured Post

Click for Links to Cabinet IRs/NAM Captures

Wednesday, July 31, 2019

Some Pedal Projects ca. 2012: Triangle Big Muff, Meathead, Woolly Mammoth

My first pedal project was a Triangle Big Muff using a the 2010 version of a Madbean Mudbunny PCB, built into a gutted Behringer VD1 enclosure. I followed the Madbean Triangle BOM: 2N5088 transistors, 1N914 and 1N4001 diodes, all resistor and capacitors values.

I used pre-bonded 24AWG wire from Smallbear in my earliest projects, which I prefer over the stranded wire from Mammoth and Tayda that I now use. The parts used were mostly from Tayda Electronics, except for the electrolytic capacitors I salvaged a component kit from my sophomore year electronics class.

Guts of the Triangle Big Muff Clone

Old video of my pedal through a Vox Pathfinder amp

Pedal through Fender Pro Junior IV

I started to put together fuzzes/overdrives on veroboard after discovering the Tagboard Effects and SabroTone blogs. I discovered Mammoth Electronics as a source of 125B-sized inexpensive enclosures. Two of the pedals I am currently playing again are the Meathead and Woolly Mammoth fuzzes.

Meathead Clone with switchable input/output coupling capacitors

Guts of Meathead Clone


Video of Input Capacitor Effect in Meathead

The effect of the large values that I chose for the output caps were inaudible. I may switch out for smaller caps in the pF and low nF range, as shown in the alternate layout on the Tagboard Effects post. The effect of changing the input cap is most prominent when using the bridge pickup for me. The 43nF setting is much more audibly different to the 10nF setting than the 20nF setting in terms of bass response.

I tend to keep the Dirt knob low, because my build turned out to be noisy past 12:00. It is also much past unity gain at that point.

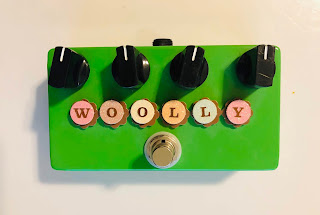
Woolly Mammoth clone

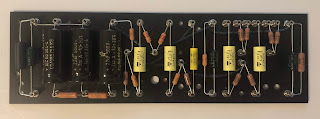
Guts of Woolly Mammoth Clone


Wednesday, July 24, 2019

Incremental Progression on Amp Builds

I finally got all the components for the Marshall-inspired build. I had to reorder and redrill the chassis due to a mistake in the layout. 

Populated 1987 Turret Board

Populated 5E3 Turret Board

Hammond Chassis Laid Out for Drilling

Top View of Drilled Chassis

Fitting the cage to drill cage mounting holes

Power Transformer Mounting Holes

Output Transformer Mounting Holes


Sunday, July 14, 2019

Buzzaround and Naga Viper Pedal Builds

Left - Buzzaround; Right - Naga Viper

I finished vero board builds of a Buzzaround and a Naga Viper based on the layouts from the Tagboard Effects blog (Buzzaround Link and Naga Viper Link). Passive components are mostly sourced from Tayda Electronics. Enclosures are from Mammoth Electronics.

Buzzaround Clone Guts.

The Buzzaround is wired as a -9V effect. I added a 100KA pot for a volume control.

Smallbear PNP Transistors.

I bought a PNP transistor set from Smallbear Electronics. Q1 and Q2 are Motorola-branded transistors of an unknown make, with markings of “9270 336” on the transistors. Q3 is a Texas Instruments 2N404A with a HFE of 140, mislabeled on the bag, but consistent with typical Buzzaround values. I also ordered the 1N270 germanium diode from Smallbear.

Video of Buzzaround Build

Naga Viper clone guts.

I had trouble fitting the vero board into the enclosure due to the height of the electrolytic capacitors I used, so I installed the board at the bottom of the enclosure. Despite the long connections to the pots, the pedal is fairly quiet for much of its gain range. A 2N2222A transistor was used.


Video of Naga Viper Clone through Fender Pro Junior and 5F1 Clone

My next pedal projects are Son of Screamer and Honey Bee pedals using the respective Tagboard Effects vero layouts.