
I recently acquired an Eastman E2OM because I wanted a small body acoustic guitar for recording. I wanted something that was not as huge sounding as a dreadnaught, but bigger sounding than a parlor acoustic.

I bought a Weber 12A125A speaker in my chase for the ideal 5E3 tone. I originally bought a Speed Shop A12Q for Tweed tones, but it turned out to be based on an early 60s speaker. Many forum posts for the A12Q remark that it is basically a Weber 12A125S, a speaker that is an Oxford replacement. A12Q did get convincing Neil Young tones, and is likely why the speaker is popular with 5E3 players. Neil Young uses a C12N speaker with his Tweed Deluxe, so the A12Q would be closer to being period correct for that sound. The top end was a little too smooth for me.

The 12A125A is the speaker I should’ve bought in the first place. It reminds me of a thicker version of the P12Q that is in the Redwirez impulse response library, which was my reference. The bright top end works well with the dark 5E3 tone.
I can see why 5E3 user may prefer the in-room tone of the A12Q, but the 12A125A’s recorded tone is exactly what I was looking for. My experience with micing the speaker so far is that I have to back the microphone off an inch more than I would with a Celestion-style speaker. When using ribbon microphones, I have to back off to about 6” off the grille to get the low end where I want it. The sweet spot for me is typically somewhere within the dust cap.


 |
| Completed CAPI LC25 Build. |
I wanted to pair an analog EQ with the Hairball FET/500 build and thought an API-based EQ would be appropriate. I had read on forums that the CAPI LC25 performed well on drums due to its fixed frequency points. It is inspired by the API 560 Graphic EQ, but with different EQ points.
 |
| CAPI LC25 Main PCB |
Coming off the Hairball build, the main PCB of the CAPI was in the same league of difficulty. I followed the directions on the CAPI website to make sure I didn’t botch the kit by building out of sequence. Component soldering went quickly, while the mechanical assembly felt a bit tedious. It didn’t take too many tools to assemble: a soldering iron, clippers, a multimeter to determine resistor values, a 0.05” Allen key, a 10mm socket wrench, and a Phillips screwdriver.
 |
| Current lunchbox modules. |
The EQ is easy to use in practice. The 2dB steps are clear and fixed frequencies make it easy to navigate.
To be continued.
 |
| FET/500 Rev D PCBs populated. |
I built a Hairball Audio FET/500 Rev D kit to get the hardware 1176 experience in a compact 500 series form factor. I jumped in during a Black Friday sale price of $385.
The kit had the highest parts count out of the few 500 series kits that I’ve built so far. The solder pads on the PCBs were rather small, comparable to ones found on DOA kits. The components were spaced out well, so I didn’t make too many inadvertent solder bridges. The assembly was fairly straightforward with a good online build guide and interactive build map on the Hairball website.
The calibration process could have gone a bit more smoothly. The trickiest of the steps was the gain reduction meter calibration with the adjustment of R540 (Tracking Adj) on the Main PCB. There is a hole on the meter PCB to access this trim pot, and it is the most difficult to adjust. I initially could not get the gain reduction to budge from 3dB when 9dB was actually present. I then read on the GroupDIY support thread that the R540 trim pot was a 20 turn trim pot. I had originally assumed that the adjustment range was within 1 turn.
Physically turning knobs as I react to what I hear is a major positive of working with hardware such as the FET/500.
Some audio demonstrating the effect of the audio path can be found here: link to files
I ran a snippet of mono drums through several pieces of hardware:
I quickly did this to see what happened to a signal being passed through the FET/500 audio path without compression versus the CAPI VP28 and EQP5.
To be continued.
 |
| Monoprice Indio Classic V2 in stock form. |
I impulsively bought a Monoprice Indio Classic V2 guitar to use as a project for some pickups I had lying around. With the help of a coupon code, the guitar cost $54 + tax to get shipped to me.
The guitar itself is decently built for its normal price point. The frets are a bit scratchy, but less so than the other Monoprice Indio Classic V2 that I have. The guitar came set up with no fret buzz. The tuners are not high ratio, so it’s easy to overshoot the pitch when tuning up if I am in a rush.
The stock pickups are bright sounding, and don’t have much bottom end. The pickups don’t feel great to play through, but the recorded sound is not as bad as I thought.
I previously had a Duncan Designed Detonator and two EY hot rail pickups in a HSS configuration in a Squier Strat. I thought these pickups would be suitable replacements for the stock Monoprice pickups.
I bought a Duncan-Designed Detonator pickup some time in the mid-2000s. I enjoyed the sound of the pickup, but started gravitating towards lower output pickups as I got older. The pickup is high output and has a lot of low end information. I would later learn that the pickup was based off a Duncan Distortion rather than an Invader.
The paint on the Hex screws was presumably coming off from age. I came across other users who had the paint come off their Detonator/Invaders hex screws, and ended up sanding off the paint. I did the same, loading each screw in a drill to sand off against a sanding sponge.
 |
| Half of the hex bolts sanded. |
 |
| Cleaned up Detonator. |
The pickup’s measured DC resistance was 16.92kohm.
I bought an 11kohm Alnico V dual rail pickup (part # EY-DRP580-BL) from EY Guitar Parts sometime back in 2016 for under $12. I had read favorable comparisons of it to GFS and Artec rail pickups at that time. The pickup sounded good as a series neck humbucker. I preferred playing the pickup in parallel in the neck position, but will keep it as a series humbucker for this guitar.
 |
| Pickups swapped in. |
I wired up the Detonator per the online documentation (green-hot, black-ground), and had to flip the polarity of the EY Hot Rail (black-hot, red-ground) for the middle position to sound right.
The Detonator is thick and compressed sounding, which is something I don’t currently get out of my other guitars. There is much more low end available than the stock pickup. I might set this guitar up to drop down 1 step, since I have more classic sounding guitars in standard tuning.
I decided to check out Neural Amp Modeler out of curiosity, and the fact that it is free. I've been wavering about purchasing IK's ToneX, but will probably eventually join the ecosystem.
I immediately tried to capture my Plexi circuit amp through a Suhr Reactive Load. I used the provided v2_0_0.wav file to reamp into my typical settings. I am still trying to get a grasp on ESR and number of Epochs for a sufficient capture. Other users on the NAM Facebook group informed me that 1000 Epochs for high gain and 500 Epochs for lower gain was typical.
Using the Google Colab set up by NAM, training a 1000 Epoch model takes about 1 hour and 40 minutes. I am surprised that a 290kb NAM file can contain such a detailed snapshot of my amp. I also like that the plugin is straightforward, laid out without bloated effects and features.
I've found a lot of useful captures of amp types on ToneHunt and the NAM Facebook group that I don't have in my collection. The amp selection is skewed towards high gain amps (Mesas, modded Marshalls, 5150s) , but there are some lower gain varieties as well. Some users have provided the dBu calibration information, which makes it as close to virtually connecting to someone's setup as it can get.
To be continued.
 |
| Completed CAPI VP28 Preamp. |
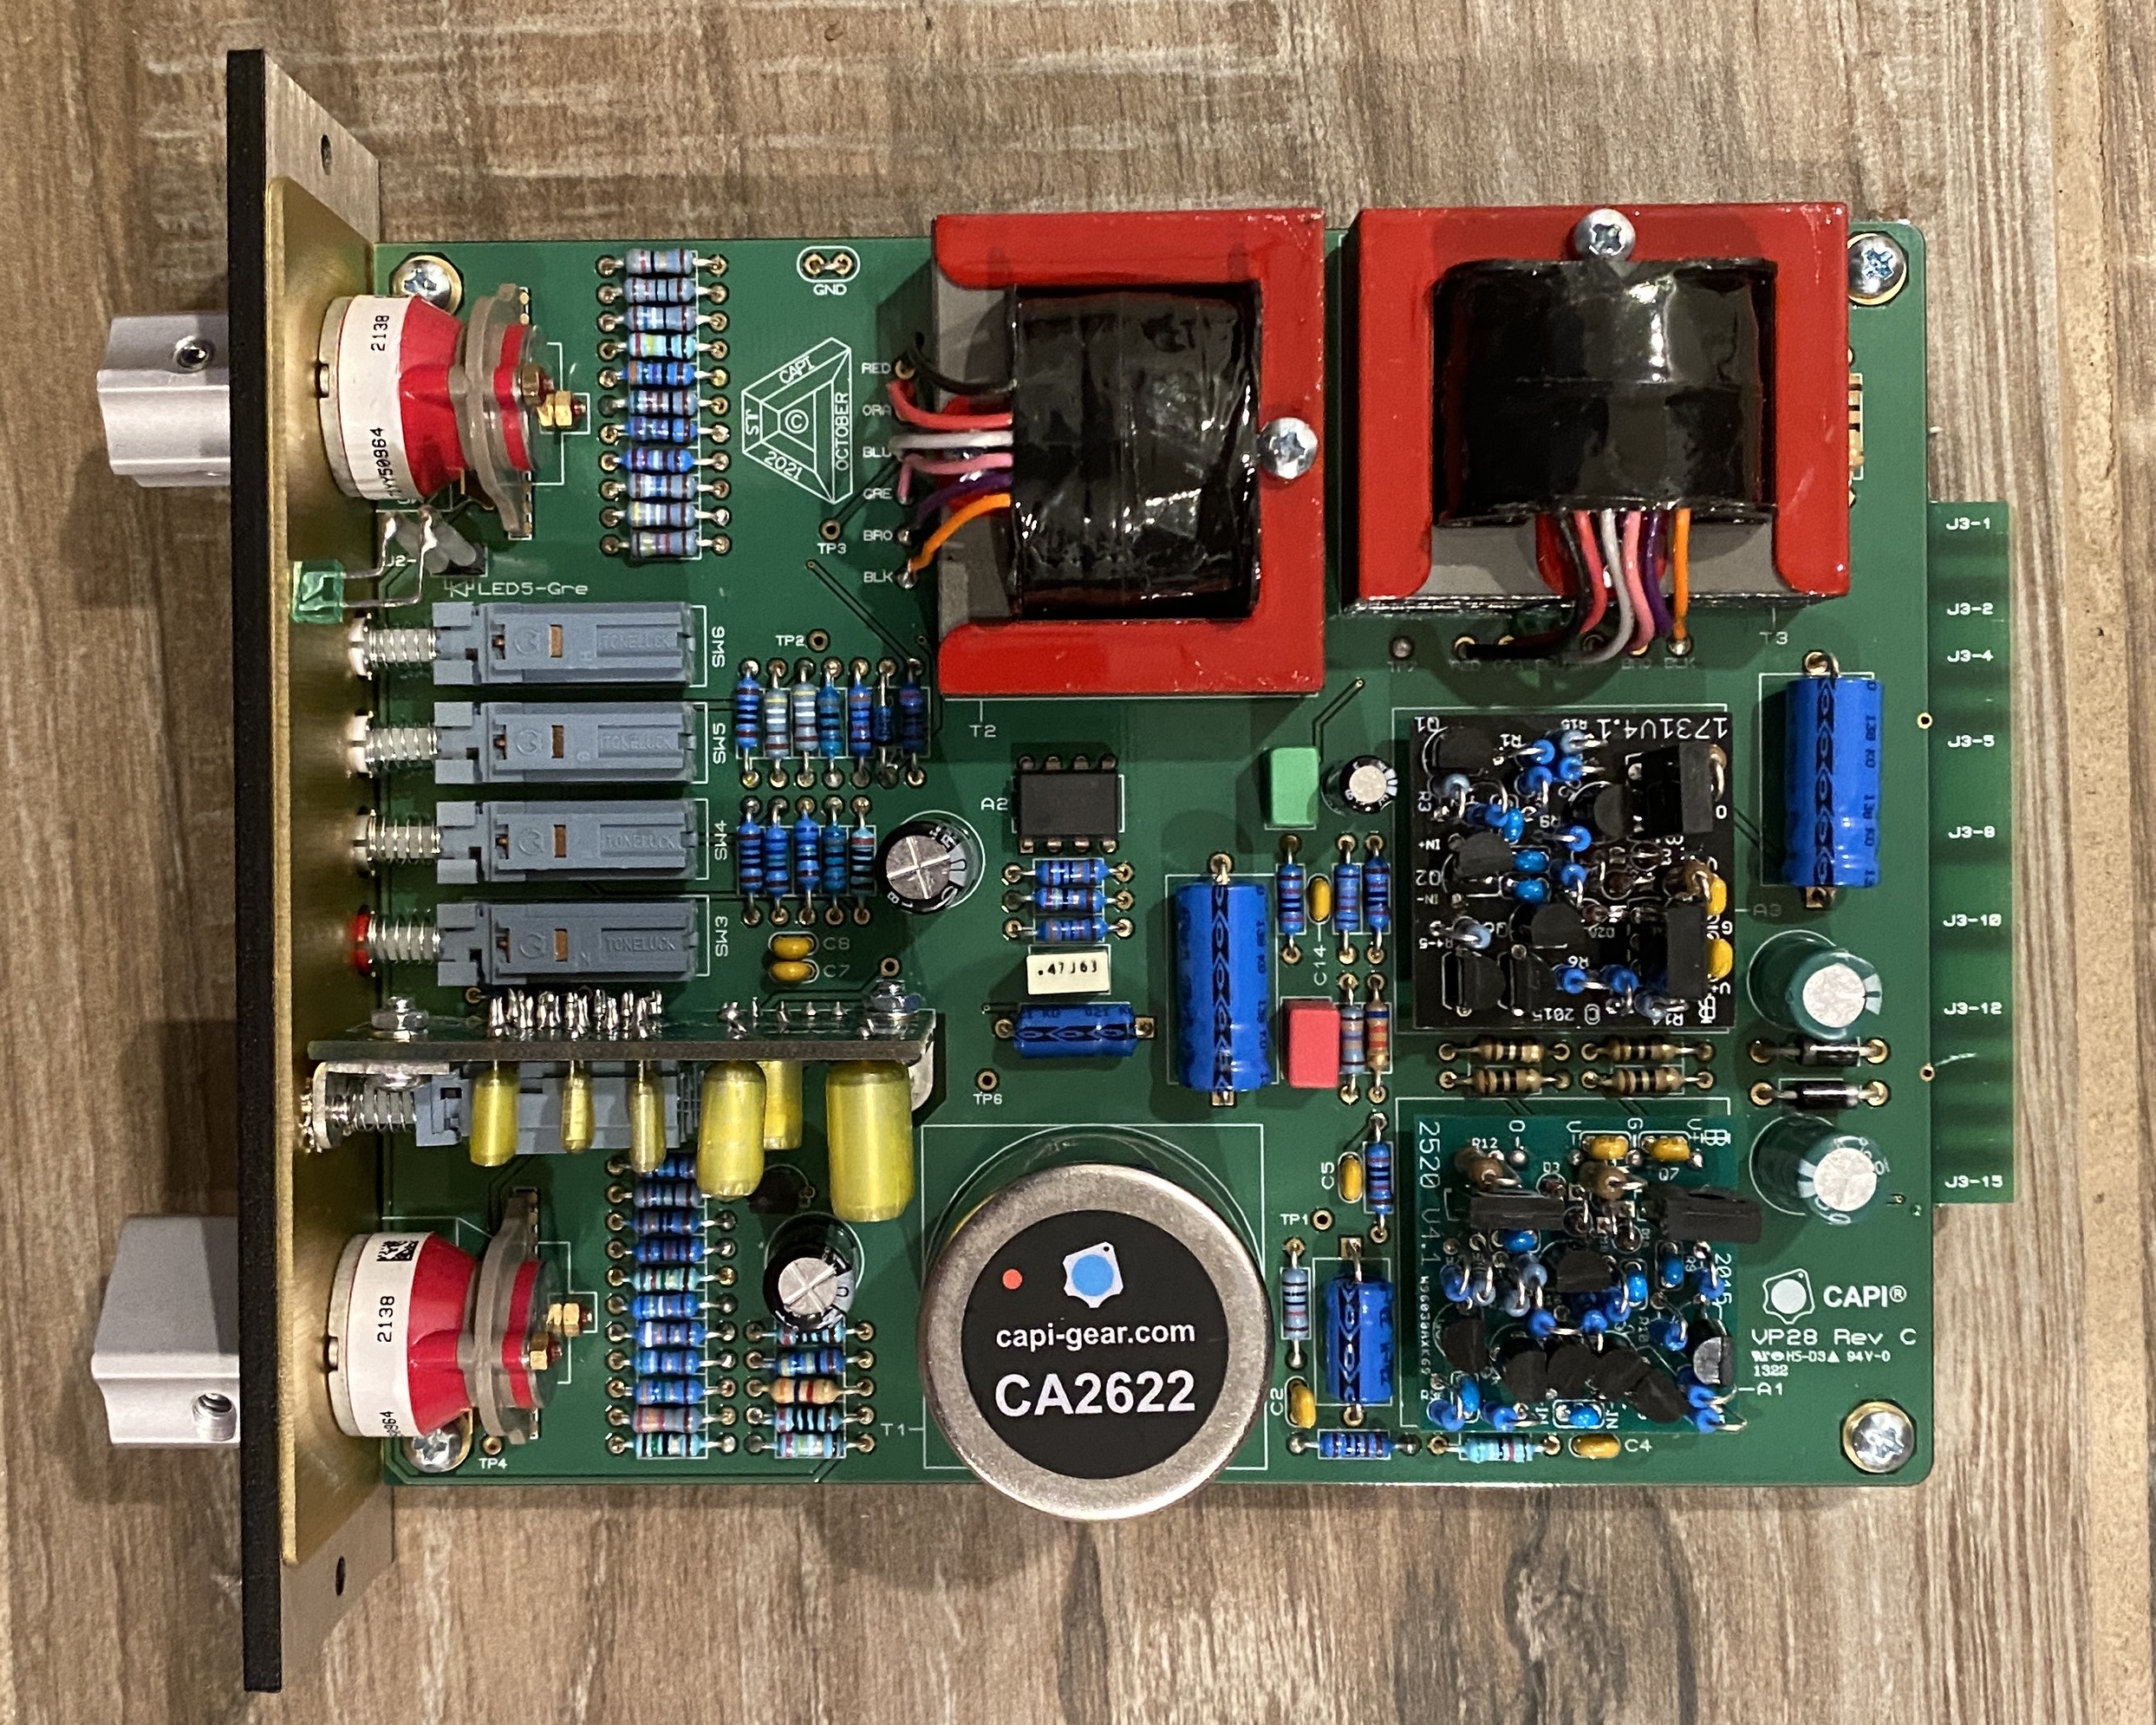
My next project is a pair of CAPI VP28 preamps, with GAR2520/GAR1731 op amps in the gain/fader positions. Referencing the GroupDIY build guide for the preamp assembly was a smooth process. There were many resistors to solder for the Elma switches, but plenty of space was available on the PCB. The aluminum right angle plate made it easy to align the PCBs with the front panel. The version of the kit that I received had lock washers in place of the star washers in all but one position. The TL081 op amp used to be socketed in the black PCB days, but all green PCBs I’ve seen have the component directly soldered.
The GAR op amps were the hardest part to put together in the whole process. The tight spacing of the PCB was challenging to solder without creating solder bridges between the Mill-Max pins and nearby components. I botched one of the GAR1731 op amps and had to order a replacement to build. The 1/2W resistor that is closest to the V- and G pins is the most frustrating part of each build.
 |
| VP28 pair in lunchbox. |
I immediately set my first-built VP28 to unity gain to run line level signals to hear the effect of API-like console conditioning. I particularly enjoy its effect on cymbals and snares. Whatever the VP28 imparts, it is almost like re-pitching the cymbal or drum up a bit.
Building these kits trained me to read resistor codes off of blue metal film resistors. Trying to figure out blue, green, and grey off of the blue resistor bodies was enough of a chore that I never tried. However, reading the codes made sorting so much quicker. Likewise, building the discrete op amp kits gave me some much needed practice in soldering. At one point, I was considering buying pre-made op amps after screwing up the GAR1731.
To be continued.
 |
| DIYRE EQP5. |
 |
| Fredenstein Bento 8. |
 |
| GAR AM10 and OA10 op amps. |
 |
| 12 String Jazzmaster. |
I preordered the Squier 12 string Jazzmaster when I saw that it was available. The build of the guitar was solid. The fixed bridge probably eliminated many of the quirks associated with setting up a Jazzmaster. The neck felt good, although it took me a minute to adjust to a 12 string guitar.
My initial impression from playing through the amp models in my HX Stomp was that I would mostly play this guitar clean or mildly overdriven. I prefer to focus on chord inversions rather than play full barre chords to hear the octave effect.
 |
| Tube trap wall. |
I bought some 3ft long Owens Corning fiberglass pipe insulation to make DIY tube traps. I went with two sizes: 6” pipe (2” wall) and 10” pipe (1-1/2” wall). The 6” model’s outer diameter is slightly larger than the ASC 9-1/2” Studiotrap. The 10” model was the largest pipe size I could easily source with free shipping, but it’s outer diameter (13-3/4”) is smaller than the ASC Isothermal (16”) and GIK Turbo Trap Pro (17”) models that I looked at.
Pipe Size | Model | Thickness | O.D. |
6” | 722568 | 2” | 10-3/4” |
10” | 722592 | 1-1/2” | 13-3/4” |
 |
| 10” pipe insulation, with 14” wood cap. |
 |
| Pipe insulation with fluffy insulation inside. |
 |
| Half-length sections filled. |
 |
| Tube traps surrounding speaker. |


