Featured Post

Click for Links to Cabinet IRs/NAM Captures

Wednesday, July 31, 2019

Some Pedal Projects ca. 2012: Triangle Big Muff, Meathead, Woolly Mammoth

My first pedal project was a Triangle Big Muff using a the 2010 version of a Madbean Mudbunny PCB, built into a gutted Behringer VD1 enclosure. I followed the Madbean Triangle BOM: 2N5088 transistors, 1N914 and 1N4001 diodes, all resistor and capacitors values.

I used pre-bonded 24AWG wire from Smallbear in my earliest projects, which I prefer over the stranded wire from Mammoth and Tayda that I now use. The parts used were mostly from Tayda Electronics, except for the electrolytic capacitors I salvaged a component kit from my sophomore year electronics class.

Guts of the Triangle Big Muff Clone

Old video of my pedal through a Vox Pathfinder amp

Pedal through Fender Pro Junior IV

I started to put together fuzzes/overdrives on veroboard after discovering the Tagboard Effects and SabroTone blogs. I discovered Mammoth Electronics as a source of 125B-sized inexpensive enclosures. Two of the pedals I am currently playing again are the Meathead and Woolly Mammoth fuzzes.

Meathead Clone with switchable input/output coupling capacitors

Guts of Meathead Clone


Video of Input Capacitor Effect in Meathead

The effect of the large values that I chose for the output caps were inaudible. I may switch out for smaller caps in the pF and low nF range, as shown in the alternate layout on the Tagboard Effects post. The effect of changing the input cap is most prominent when using the bridge pickup for me. The 43nF setting is much more audibly different to the 10nF setting than the 20nF setting in terms of bass response.

I tend to keep the Dirt knob low, because my build turned out to be noisy past 12:00. It is also much past unity gain at that point.

Woolly Mammoth clone

Guts of Woolly Mammoth Clone


Wednesday, July 24, 2019

Incremental Progression on Amp Builds

I finally got all the components for the Marshall-inspired build. I had to reorder and redrill the chassis due to a mistake in the layout. 

Populated 1987 Turret Board

Populated 5E3 Turret Board

Hammond Chassis Laid Out for Drilling

Top View of Drilled Chassis

Fitting the cage to drill cage mounting holes

Power Transformer Mounting Holes

Output Transformer Mounting Holes


Sunday, July 14, 2019

Buzzaround and Naga Viper Pedal Builds

Left - Buzzaround; Right - Naga Viper

I finished vero board builds of a Buzzaround and a Naga Viper based on the layouts from the Tagboard Effects blog (Buzzaround Link and Naga Viper Link). Passive components are mostly sourced from Tayda Electronics. Enclosures are from Mammoth Electronics.

Buzzaround Clone Guts.

The Buzzaround is wired as a -9V effect. I added a 100KA pot for a volume control.

Smallbear PNP Transistors.

I bought a PNP transistor set from Smallbear Electronics. Q1 and Q2 are Motorola-branded transistors of an unknown make, with markings of “9270 336” on the transistors. Q3 is a Texas Instruments 2N404A with a HFE of 140, mislabeled on the bag, but consistent with typical Buzzaround values. I also ordered the 1N270 germanium diode from Smallbear.

Video of Buzzaround Build

Naga Viper clone guts.

I had trouble fitting the vero board into the enclosure due to the height of the electrolytic capacitors I used, so I installed the board at the bottom of the enclosure. Despite the long connections to the pots, the pedal is fairly quiet for much of its gain range. A 2N2222A transistor was used.


Video of Naga Viper Clone through Fender Pro Junior and 5F1 Clone

My next pedal projects are Son of Screamer and Honey Bee pedals using the respective Tagboard Effects vero layouts.

Sunday, June 30, 2019

Another Distraction - GGG Green Ringer Kit

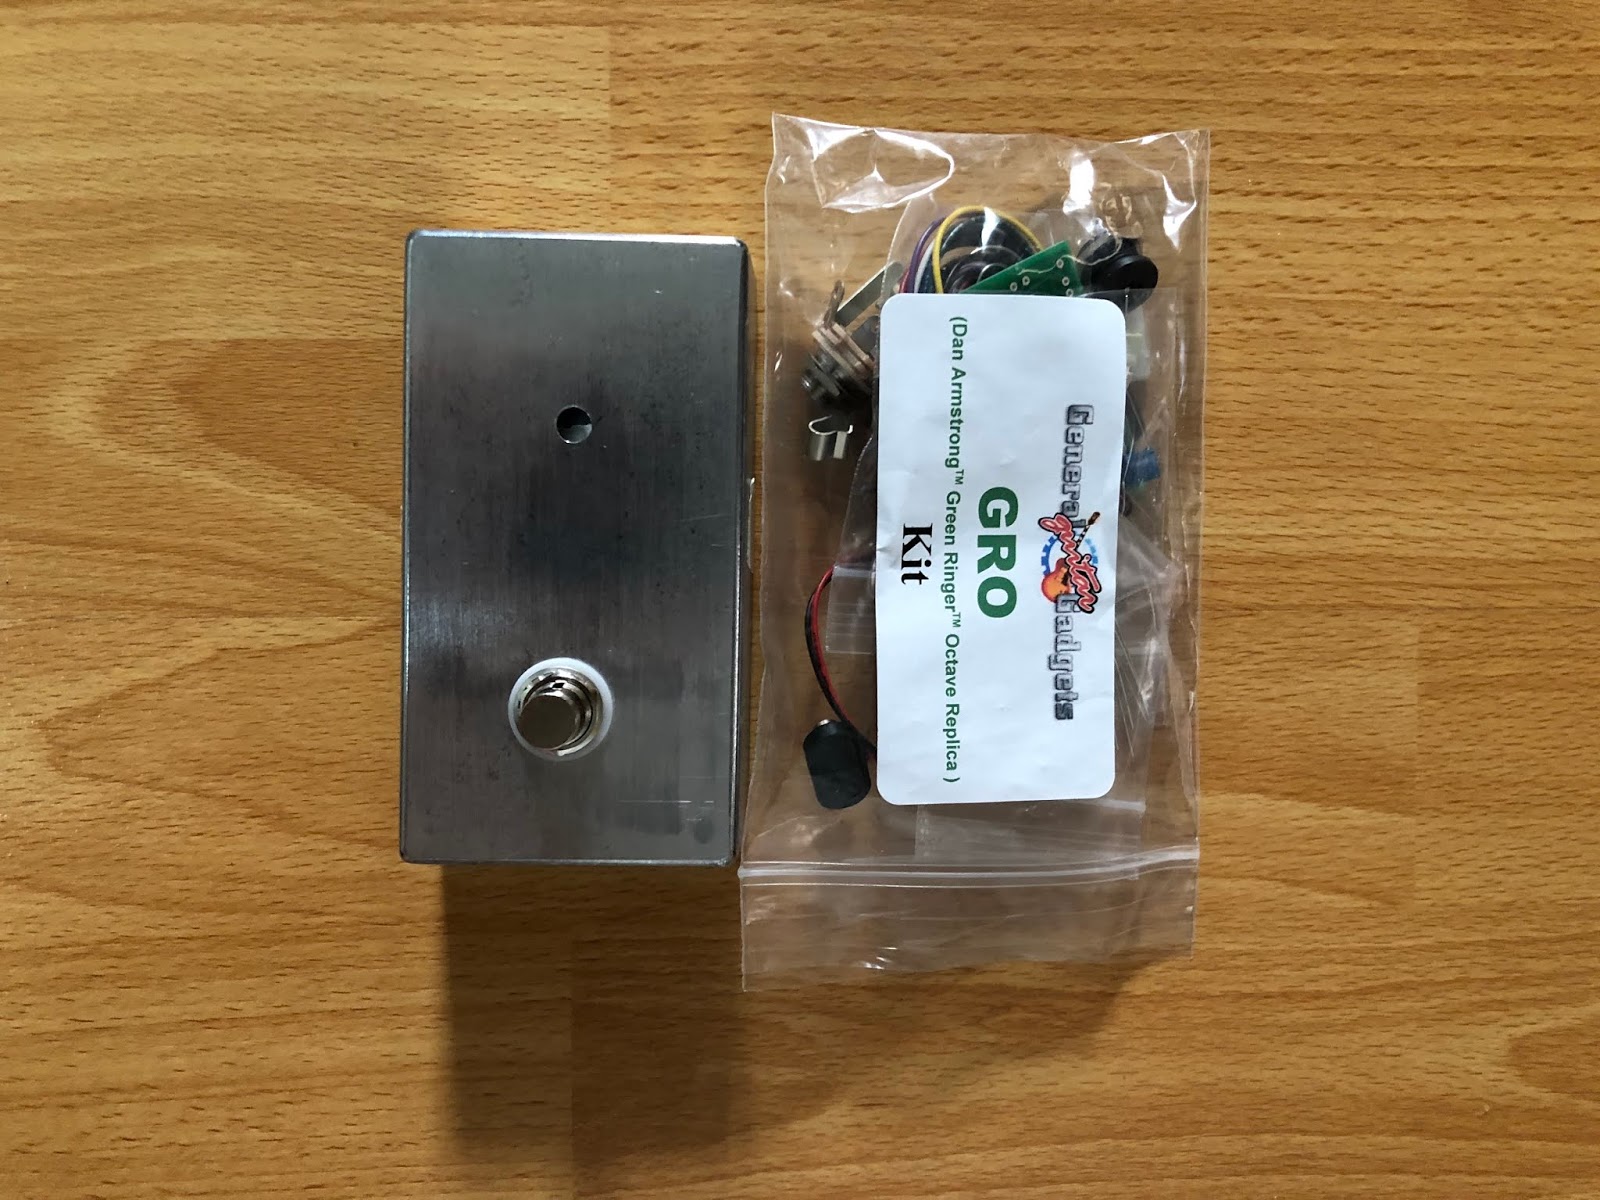
Enclosure and Bag of Components

Front of Enclosure

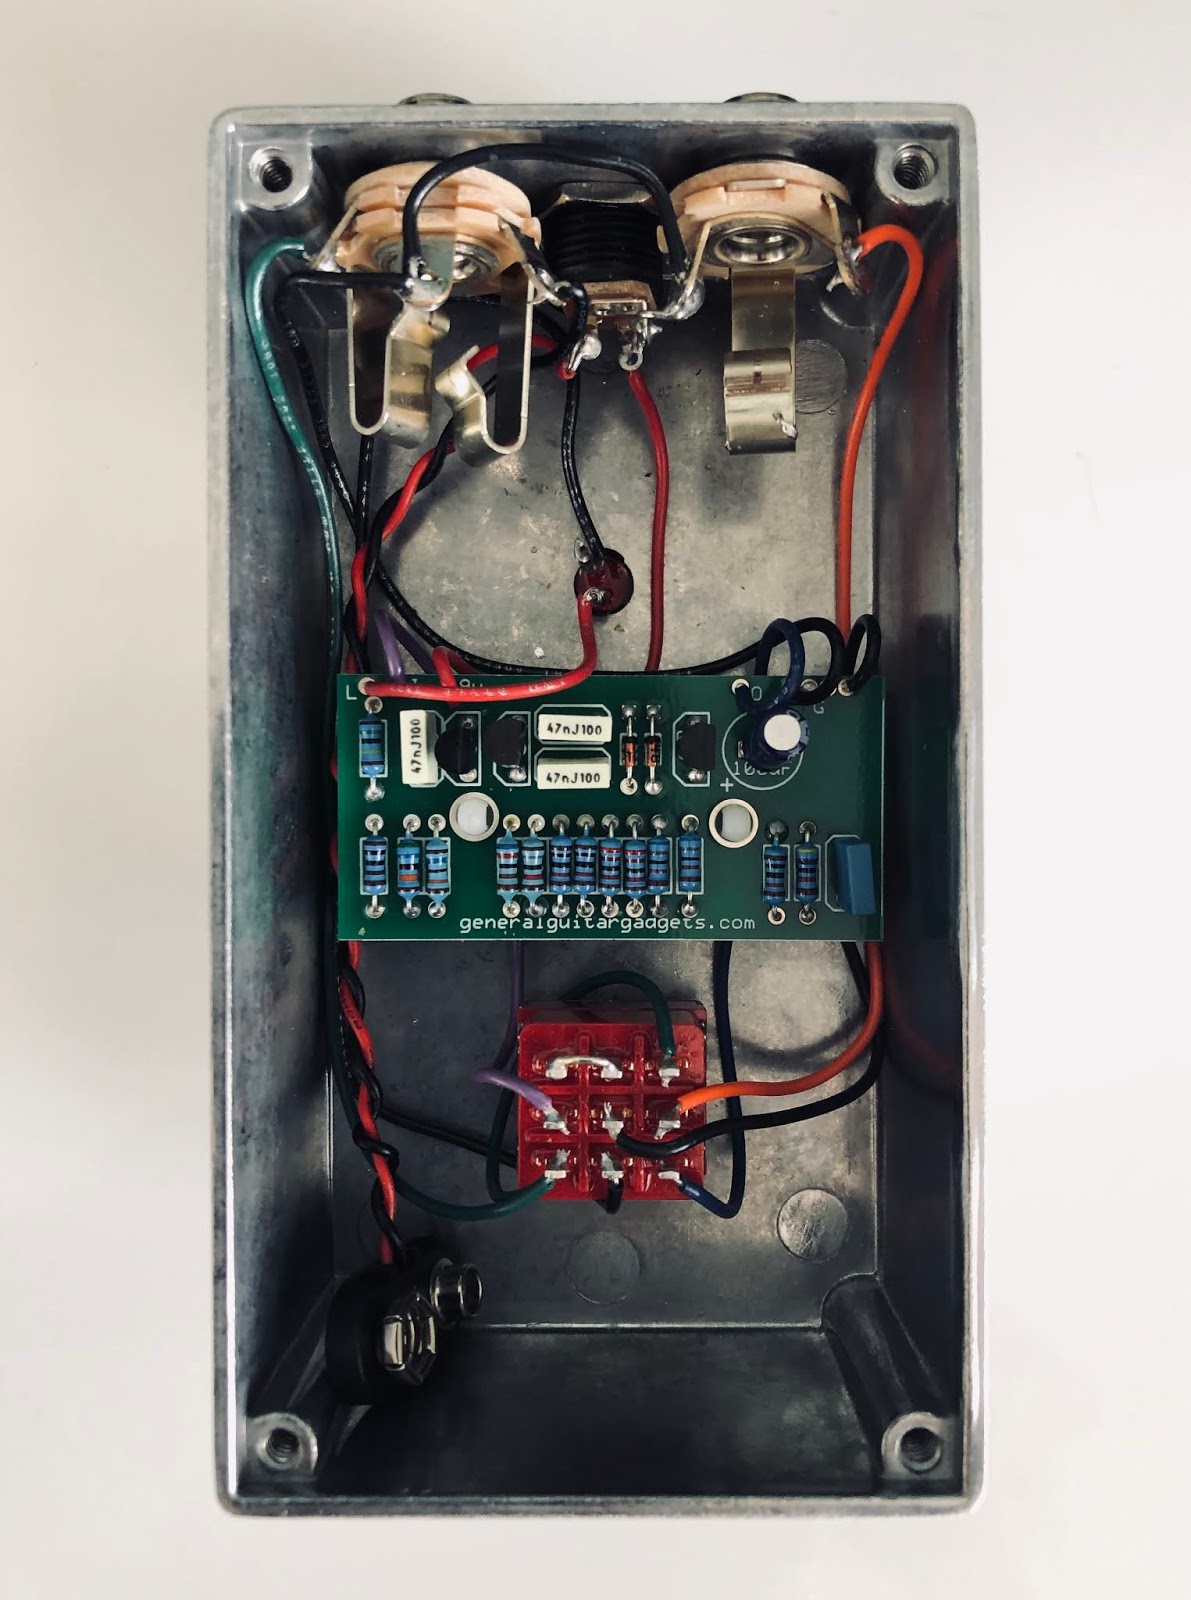
Completed Wiring

I bought a Green Ringer pedal kit during the General Guitar Gadgets recent sale. I had attempted 2 unsuccessful builds of a Green Ringer on vero board in the past.

The kit came with 2 2N5089 transistors (Q1, Q3) and a MPSA92 PNP transistor (Q2), with 1N4148 diodes.

I had originally tested the pedal by reamping a recorded guitar signal, and came across a persistent hum. I rechecked continuity through all of the solder joints.

However, the effect worked properly when interfaced with an electric guitar’s pickup. The effect seems sensitive to impedance. With a pickup simulator in front of the pedal, the hum was not present.

The pickup simulator is an older build, based on the project on the AMZ website (Link). I used the same 42TL019 10KCT:600CT transformer, with switchable capacitor values based on the AMZ (330pF) and DIYRe (820pF) versions. The transformer secondary is switchable between using the full windings and the center tap to simulate Humbucker and Single Coil pickups respectively.


Pickup Simulator

Pickup Simulator Wiring


Clips of the Green Ringer to come.

Thursday, June 20, 2019

Plexi and 5E3 Turret Board Progress


As I upgraded some of the 2W metal film resistors to 3W on the 1987 turret board, I started populating a board for a future 5E3 head build that I have been putting off.

All passive components are now ordered except for the filter capacitors and a diode for the 1987 board. I am now considering installing a hi/low B+ voltage switch on the Plexi. I plan on using the 625V tap on the ClassicTone 40-18095 power transformer, but am thinking about utilizing the 690V or 560V taps.

The 5E3 will likely  be a straightforward build, with little or no modifications. Parts will be Vishay metal film resistors, Vishay MKT1813 and Cornell Dubilier 150 film capacitors, F&T filter caps, Cornell Dubilier silver Mica capacitors, and ClassicTone transformers.

Thursday, June 13, 2019

Budget Dirt Pedalboard


Signal Flow
DOD Carcosa
Way Huge Havalina
Way Huge Saucy Box
BBE Green Screamer
DOD 250
DIY SHO Clone
DIY Fetto Clone
DIY Red Llama Clone
DOD Boneshaker
DIY Distortron Clone

The pedals were mounted with Velcro on a piece of 22”x12” lexan. A Roadrunner All-In-One Pedalboard Gig Bag houses the pedals. A 10-pedal daisy chain is used for power connections. EBS flat patch cables and pancake patch cables were used to interconnect pedals.

All pedals are either DIY or impulse sale/clearance buys.

Video of Green Screamer, Saucy Box, 250, SHO Clone, SD-1 (not on board) boosting a Fender Pro Junior


Video of Jet City JCA22H boosted by the same pedals plus a DOD Boneshaker

Thursday, June 6, 2019

Start of Plexi Turret Board Work


I started populating the turret board with the components on hand. There were a couple of parts that had leads that were too short for this board.


  • The V1A cathode bypass capacitor is 1uF, with off-board values of 3.3µF and 220µF to be switched in parallel.
  • I couldn’t get the 2.7kΩ resistor onto the V1B cathode and will order a 2W metal film resistor for this position.
  • The V1B coupling capacitor on the board is 0.0022µF, with 0.022µF switchable in parallel.
  • The mix capacitors will be switchable off-board on either channel.


  • The V2A cathode bypass capacitor will be switched into the circuit off-board between 0.68µF and 330µF.
  • I will switch out the 2W metal film resistors above for the 3W for a more uniform look.
  • The tone stack will be switchable between lead and bass. Bass spec values (250pF, 56kΩ) are laid out on the board.
  • The 0.022µF coupling capacitors will be switchable to 0.09µF via parallel 0.068µF capacitors.
  • The bias pot will be installed on the chassis.
  • A diode still needs to be installed. The leads on the 1N4007 that I ordered had were too short for the terminals on the board.

Tuesday, April 30, 2019

Continuation of Plexi-Inspired Build


The rear of the chassis was drilled out for the power (Neutrik Powercon) main and HT fuses, bias test points, and various tone mods.


The main perfed turret board is from ValveStorm. Black turret strips are from Antique Electronics Supply (Tubes and More).

I am drafting the layout in AutoCAD to tentatively coordinate the various theoretical locations of drilling points. All holes smaller than 3/4” will be hand drilled. Holes for tube sockets and capacitor cans will be made with the corresponding Greenlee hole punches.

Finalized wiring layout to come prior to further drilling of the chassis. I am trying to find time to coordinate turret board mounting with the mods (black turret strips), Larry grounding, and transformer wiring based on the specific Classictone transformers I plan on purchasing.

Monday, April 29, 2019

Vox Pathfinder 15R Impulse Responses


Latest Download Link

I have started making impulse responses of my Vox Pathfinder 15R 1x8 combo amp.

The signal chain is:
Steinberg UR44 Line Out
Art DTI Isolator
Seymour Duncan Powerstage 170 Power Amp
Vox Bulldog 8" Speaker
Shure SM57 Microphone
Stam SA-73 Preamp
Steinberg UR44 Line In

A 3.0s sine sweep was created in Voxengo Deconvolver. The impulses are 500ms long.

Two 2’ x 4’ x 4” OC703 panels are used to cut down on room ambience, as shown in the photo.

I have started with on-axis captures with an SM57 microphone, and will repeat using varying distances with other microphones.

Wednesday, April 24, 2019

New Pedalboard


Signal Flow
Loop A
-Monoprice Compressor
-Digitech EX-7
-DOD 440
-DOD Gonkulator
Loop B - External Pedals
Behringer UV300
EHX Small Clone
EHX Small Stone
Ibanez PM7
Mosky Spring Reverb
Ibanez DE7

Pedals were installed on a Donner DB-3. Two Snark 9VDC power supplies power 5 pedals each. The Digitech EX-7 is powered off the factory 9VAC power supply.

Loop B is used to patch in different drive pedals.